Showing posts with label The Scrapping Cottage. Show all posts

Sunday, August 26, 2012

Cottage Cutz Happy Wedding Day!


Hello and happy Sunday to you!  Oh, what a glorious Sunday it is for us, because it's RAINING!!  We've seen little more than a drop here and there for almost exactly 4 months!  We're DEFINITELY doing the happy dance today!!  Another reason for happy dances would certainly be weddings, and I have a card to share with you on this rainy day that was made with dies from the Wedding Release at The Scrapping Cottage.    Here's the card I created with the dies, which I'll list below. 
This is the fabulous Cottage Cutz die I used to create this card:
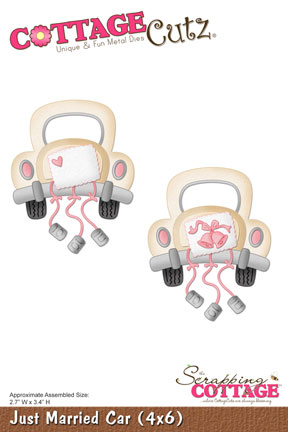
Here's a close-up picture of the car.  I thought you'd like to see the gorgeous sparkle that I gave this piece by spritzing it with some Shimmer Mist (Frost).  It IS a wedding card after all, and ya just can't have a wedding card without some bling.  At least I can't!  ;-)
I used a variety of Copic markers shown in the photo below to color the image, which was cut with Express It Blending Card.  The VERY best choice for coloring with Copic markers, in my humble opinion.  Oops!  Looks like I've got BOTH of my N4 markers in there!  LOL!!
Here's a closer look at the entire card.
And again, here is the finished card.  The sentiment comes from Stampin' Up!, as does that beautiful ribbon.  I added a few rhinestones to the cans, for yet a little more bling.  Gotta LOVE that bling!!
Thanks so very much for stopping by The ThINKin' Spot today!   I hope you have a blessed and beautiful day, and that you're finding reasons to be doing the happy dance, too!  Happy stamping!!


Friday, June 29, 2012

The Scrapping Cottage/CottageCutz June Blog Hop


 Good morning, and welcome to The Scrapping Cottage/CottageCutz June Blog Hop!  We have some gorgeous creations to share with you, so grab your favorite cool and refreshing drink and join us for all the fun!  There is a fabulous line up of inspiration, and of course there will be prizes, so be sure to leave a comment on each designers blog, because we're not sure which designer will be awarding one of the wonderful prizes.  The more you comment, the better your chances of winning, so HOP to it!!  ;-)

You should have arrived here from The Scrapping Cottage Blog, but if not, no worries, because it's only one stop back and you'll need to begin there to find out all the wonderful details.  That will also be where we end the hop, and I don't want you to miss a thing, so be sure to start AND end there!  

For my card, I used some of my newest Cottage Cutz dies, and with Independence Day just around the corner, I thought this beautiful Graphic 45 patterned paper was the perfect color choice.  I've been wanting to use that paper for a very long time, and I'm so glad I did!  I just love it!
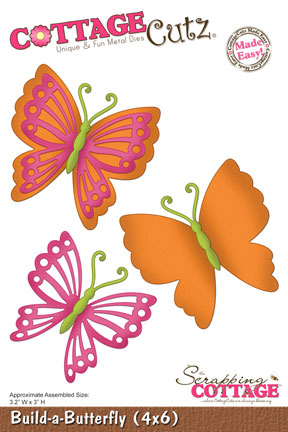
 I used a combination of colored and white card stock for this card, and the sentiment, which comes from Market Street Stamps Riding By stamp set was stamped with Stampin' Up! white craft ink and embossed with white embossing powder.  The edges of the white butterfly wings was sponged ever so lightly with Time Holtz distress ink in Vintage Photo, and the finished butterfly was embellished with rhinestones.  I used an action wobble to attach the butterfly to the card, and with a flick of the wrist, it looks like it's ready to take flight!  


Here's a little closer look at the detail on the butterfly and doily.   For this card, I used the following dies:


 Thank you so much for joining us today!  It's always a pleasure to share with you!!   Your next stop on this terrific hop is at the amazing and extremely talented Cindy Haffner's Blog.  Should you happen to get lost along the way, below you will find a list of all the stops.  

The Scrapping Cottage Blog-http://scrappingcottage.blogspot.com/ 
The Scrapping Cottage end! http://scrappingcottage.blogspot.com/

Have a blessed and beautiful day and weekend, my crafty friends!!!!!


Tuesday, June 26, 2012

CottageCutz Spring Wreath Thank You


Good morning!   Today,  I've created a sweet little thank you card with my new Cottage Cutz dies.  Boy do I LOVE these designs from the Spring Blossoms Release!  They are so pretty!!!  Here's my card...
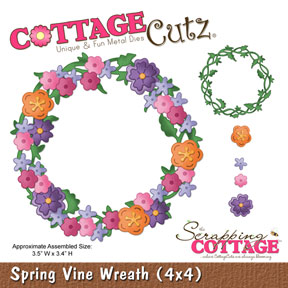
One thing I love about using Cottage Cutz dies is that I can use up a lot of my small pieces of scrap paper for designs like this one, and that's exactly what I did.  All of the card stock was from my scrap bin.  I did a little flourish stamping behind the wreath for some added interest.  I followed through with pearl accents on the flourish, as well as the flower centers.  This turned out so sweet and pretty and I hope you like it as much as I do.  Below, is a picture of the Spring Vine Wreath CottageCutz die that I used, and if you just click on the picture, it will take you directly to The Scrapping Cottage Store to check it out.  It's a dandy!!!

If you haven't dropped by The Scrapping Cottage Blog lately, then you SHOULD, because our amazing design team keeps the inspiration flowing, and we certainly appreciate you spending some time with us, your feedback and your kind comments.  Be sure to drop by and check out the new creations every day.  You'll be glad you did!!  Have a blessed day, and happy crafting, friends!!!


Friday, March 16, 2012

CottageCutz Elegant Easter

 Good morning!!!  It's TGIF, another weekend is upon us, and I hope you have plans for making it a great one.  Today, I'm sharing a card I created for Easter, using some really wonderful and oh, SO EASY CottageCutz dies.  I call this one an elegant Easter card, because that's exactly what comes to my mind when I see these beautiful Filigree Easter Egg CottageCutz dies.  These amazing designs afford you the opportunity to make positively gorgeous creations with very little effort.  With some beautiful patterned paper, glitter card stock, and just the right embellishments... VOILA!  Something that looks like you spent hours!!!  Now, THAT'S what I'm talkin' 'bout!!  Here's my card in several views so that you can take in all the wonderful detail of these dies.
 I used DCWV glitter card stock to cut these beautiful Easter eggs.
 A close up view of all the gorgeous detail and sparkle.  Just a few strategically placed pink pearls were just the ticket! 
 You can see that I nestled the eggs into three layers of grass that I cut using the CottageCutz Grass Border die.  This die is a MUST HAVE staple in any collection.  I use mine for so many projects!  I LOVE IT!!
The banner for the sentiment was cut by hand, and the patterned paper is from my scrap stash.  I loved the muted colors with just the pop of pink and burgundy in the paper.  It's very Victorian, and again... SO elegant!

I'm so glad you could join us today.  I wish you a wonderful day, and  weekend filled with everything you love.  If you're lucky, maybe there will be some crafting with CottageCutz in it for you!!  Happy crafting!!


Sunday, February 26, 2012

A Little Behind...

Happy Sunday to you!! Boy, does my blog title say it all today!! I've had a plan for this card ever since I saw the cute Bunny Front and Back Cottage Cutz dies from The Scrapping Cottage. The thought for this card immediately came into my head, and I got right to work! Well, the best laid plans often go awry (as the quote goes), and that's exactly what happened to me!! I finished my card, even saved all of the markers I'd used into a basket for photographing, and all I needed to do was computer generate the "We're A Little Behind" sentiment. THAT is as far as I got! I got busy and completely forgot to print the sentiment and post my card!! SO, I'm late today and I do so apologize for that! With ALL that being said, here is my card for you, and I hope it was worth the wait. It sure makes me laugh when I see these bunny behinds, and I hope it gives you a chuckle, too!
All of the card stock and paper for this card came from my scrap bin. I added some pleated satin ribbon and chocolate colored pearls for embellishment, and kept it at that, because I want these bunny behinds to shine!! They are, afterall the main attraction, and what cute little behinds they are!!  The Happy Belated Birthday sentiment is from the Country Bumpkin Gracee Goose (CB-09) stamp set from Peachy Keen Stamps.

(Click on the Picture to see a bigger photo.)
This basket contains every marker that I used to color these bunnies, and yes, I DID use each and every color, AND you can add C1,C3, and C5 to that mix, because I took those out to work on something else, and they didn't make it back to the basket.

So glad you could visit The ThINKin' Spot today. Make it a great day... EVEN if you're a little... BEHIND!!!!

Monday, February 6, 2012

Take Time To Smell The Flowers

Good morning!  It's still technically winter around here, even though our weather has been more like spring, so with all this spring in the air, I couldn't resist playing with the new Cottage Cutz dies from Peachy Keen Designs. Some of my all time favorite images are now available in die form, and they come complete with adorable face stamps to give you all the versatility you can imagine!!


For this card, I used the Cottage Cutz Shower Peepers 4x6 die, along with the My Little Shoebox Ornate Circle Frame 4x6 die. I added some pearls to the flowers, and pretty satin and organza ribbon for embellishment. I found this sentiment in a set of stamps I had from Peachy Keen Stamps called Spring Bouquet. I cut this chickie out with white card stock and I colored it with Copic markers. Before I colored, I stamped the face with Memento Tuxedo black ink, which is great for use with Copics because I never have to worry about it smudging. The patterned paper is some I had in my stash from Stampin Up!, and I did pop this cutie up onto an action wobble, so she's got a little bit of wiggle going on. What a happy card!!!

Be sure to head over to The Scrapping Cottage to check out all the wonderful new dies. There's still time to get your order in for the Valentine's Day release, and these Cottage Cutz by Peachy Keen Designs like I used today are now in stock, AND if that's not enough newness for you, you can now preorder the beautiful and absolutely gorgeous spring release!!  Oh, and just FYI, the Cottage Cutz dies by Peachy Keen Designs are available both at The Scrapping Cottage and Peachy Keen Stamps .

So glad you could join us here today! I wish you a blessed and beautiful day and some happy crafting, too!


Tuesday, January 17, 2012

Sending Eskimo Kisses

Good morning!  I hope you enjoyed a great weekend, and if you're lucky, you enjoyed an extra day this week with the holiday on Monday.  That's an extra day for crafting, which sounds like a productive way to spend a day off.  Even though it doesn't feel quite like it, believe it or not, we're still in the middle of winter.  It was 53 degrees on Monday  morning here in Missouri when I finished, this card.  Nothing like the snowy scene you see here, in fact, but beautiful, sunny, and warm outside.  Not our typical January weather, but very nice.  Very, very, nice.   Guess we'll just have to wait and see what mother nature has in store for us for the rest of the winter.  In the mean time, it's fun to create cute winter scenes with my Cottage Cutz dies from The Scrapping Cottage.  

This sweet little Eskimo with Igloo Cottage Cutz die is so much fun to paper piece using patterned paper, and that's exactly what I did with his clothes.  I added some shading with Copic markers, and of course had to bling it up a bit with some glitter for sparkle.  I sponged the edges of the fur on his clothing with some distress ink, and I sponged the igloo with blue ink to accentuate the blocks.  The sentiment is from Peachy Keen Stamps, and I finished this card off with some waffle weave red ribbon.   I can see this particular die being used on some adorable "Winter Fun" scrapbook pages, as well as cards. 

Thanks so much for stopping by today.  I hope you have a wonderful day!  Happy Stamping!


Friday, January 6, 2012

Bliss

Good morning!  I have a SUH-WEET little card to share with you today.  I titled this one "Bliss", because cooking is something I LOVE to do, and the result, for this sweet little mouse, anyway is cupcakes.  Now THAT'S what I'd call "bliss".  

I cut this adorable Miss Chef Mouse out using white card stock, and she was colored with Copic markers.  I added some Stickles to the frosting on the spoon and cupcake for added sparkle,  and a little rhinestone bling was all this needed for embellishment.  Isn't she a cutie, and even though she was a part of our Christmas release at The Scrapping Cottage, just by changing the colors I used, she would be perfect for any time of year, and any recipe or scrapbook page, too!  I love it when I can get double duty out of my dies!  I'm entering this card into the Die Cutting Challenge on the Moxie Fab World.  You can check out that challenge here.

Thanks so much for spending some time here today.  I wish you a very Happy New Year and a wonderful weekend!  

Monday, December 26, 2011

Happy Winter!

Good morning, and welcome to The ThINKin' Spot!  I sincerely hope that you ALL have enjoyed a wonderful Christmas celebration.  We've had gorgeous weather here in mid MO, for this time of year, with highs near 50 degrees, and lots of sunshine.  Not so Christmas like, but nice just the same.  My card today reflects the kind of mood I'm in, because I'm one that likes the change of seasons, and yes, I even like winter.  I enjoy snow, and all the wonderful and fun things the first snowfall brings, like sledding, and bonfires, and snowmen.  So, with that being said, here's my Happy Winter card for you!  ;-)
 This Winter Snowman Cottage Cutz die from The Scrapping Cottage is so perfect for ALL your winter cards and projects.  I just left out a few of the accessories included with this cutie to make him more of a general winter character than a Christmas one.  He's ready for some snowy fun, just like we are!!  

Wishing you a bright and beautiful day and happy stamping!


Friday, December 16, 2011

Driving By With Merry Christmas Wishes

Good morning!   I'm just driving by this this cute little Santa to send you wishes for a VERY Merry Christmas!  I was so happy when this Santa's Truck with Tree die arrived in my mailbox, because I though he was SO stinkin' cute!!  I knew it would be loads (pun intended) of fun to work with, and I wasn't wrong!!  Here's my card using this adorable Cottage Cutz die.
I cut nearly everything with white card stock and colored with Copic markers, with just a few exceptions.  Now with this being Santa's ride, I just HAD to have a little bling, and glitter card stock fit that bill to a "T".   If you haven't asked Santa for all those Cottage Cutz dies that are on your wish list, then you'd better get to it.  Just eight more days, and the big day will be here!

Thank you so much for stopping by today.  I hope all your preparing and planning for Christmas is going well, and that you're ready to sit back, relax, and enjoy the holidays.  I'm getting there, too!  Have a blessed day and happy stamping!
Love ya!
Lorie

Friday, December 2, 2011

PSA Essentials/Cottage Cutz Holiday Card Blog Hop

 Hello and happy Friday!  We've got some fun and inspirational hopping for you today, sponsored by PSA Essentials and Cottage Cutz.  If you arrived here from Angie's Blog, then you're hopping along in perfect order, but should you have just happened along,  then you'll need to go back to the beginning, to Kay's Blog, and hop along from there, so you don't miss a thing!

I used the Ornate Poinsettia Cottage Cutz die to make this card, and I cut it in both green and red glitter card stock, then layered the pieces for a dimensional effect.  I love the contrast of the sparkly poinsettia with the rustic Basic Grey designer paper.  The sentiment is from the Oh By Golly stamp set from peachy Keen Stamps. 
There are some great ways for you to win prizes for this blog hop.  Here's what you need to do to be entered to win a prize...
Hop to each of the blogs in this hop, comment at each, and be a follower of PSA Stamp Camp to be entered to win the “Holiday Card” prize.  This prize contains 3 Peel & Stick stamp sets, 1 stamper, 1 black ink & 1-2 color ink from PSA Essentials.   The winner will also receive a $50 gift certificate to The Scrapping Cottge for the grand prize.   There are also 9 opportunities to win a 3 x 3 die from The Scrapping Cottage, and those will be awarded from the comments on each individual Scrapping Cottage Designer's blog.  

Thank you so much for hopping along with us today.  Your next stop is at the talented Kim Schofield's Blog  Below, please find a list of all the stops on this hop, just in case you lose your way.  Have a blessed and beautiful day and happy stamping!! 

·         www.kcreatedbykay.blogspot.com - Kay Norman
·         http://www.thecountrychiccottage.net -  Angie Holden
·         www.thethinkinspot.blogspot.com - Lorie Souther
·         http://paperiepetals.blogspot.com - Kim Schofield
·         www.maisymary.blogspot.com  - Pearl Liu
·         www.lingshappyplace.blogspot.com - Vera Yates
·         www.stampingwithjanice.blogspot.com  - Janice Wilson
·         www.simpleflourishes.com - Jennifer Holmes
·         www.pinkcloudscrappers.blogspot.com -  Lori Leng
·         http://inkypaws.blogs.splitcoaststampers.com/ -  Jeanne Streiff
·         www.ginicagle.blogspot.com  - Gini Cagle
·         www.livingthecircuslife.blogspot.com - Kim Moreno
·         www.taylordconcepts.blogspot.com  - Erika Taylor
·         www.fantastink.blogspot.com - Meylssa Connolley
·         www.handmadebyangelica.com  - Angelica Suarez
·         www.sweeetdesignsbycheryl.blogspot.com  - Cheryl Walker  
·         http://maearmstrong.blogspot.com - Mae Armstrong
·         http://scrappingcottage.blogspot.com/ - The Scrapping Cottage
·         www.psastampcamp.blogspot.com – PSA Essentials

Saturday, November 26, 2011

Jingle, Jingle, Jingle!

 Good morning!  The holiday season is now fully upon us, and that of course includes Christmas cards.  I have a fun little card to share with you today that I made using the Christmas Fawn Cottage Cutz die from The Scrapping Cottage.  I cut this out with white card stock and colored him with Copic markers.  I love this sweet little guy, and I paired him with the Jingle, Jingle, Jingle sentiment from Peachy Keen Stamps, and added the jingle bells for embellishment. 
Have you dropped by The Scrapping Cottage for their sales this weekend?  Be sure to check them out, because there's savings everywhere you look, from merchandise, to shipping, and a special release just for Black Friday.   AWESOME!!!!  Have a blessed day, and a fabulous finish to your weekend, and Happy Holidays!!!


Sunday, November 6, 2011

Baby It's Cold Outside!

Good morning!  Yeah baby!  It IS cold outside, and getting colder.  I guess it's time, and after the long hot summer, I'm ready.  It sure makes crafting winter and Christmas cards much easier.   I've been playing with the dies from the latest Christmas release at The Scrapping Cottage, and this card was made with the Winter Bird with Ornament Cottage Cutz die.  This one was really fun to color, and I love the bigger size.  I can't help it, I just love to color bigger images and die cuts.  This was cut with white card stock and colored with Copic markers.
I used some Basic Grey paper for this card, and I added plenty of stickles to the ornament, along with a rhinestone embellishment.  NO ribbon on this one, and I gotta tell ya that it just doesn't feel right!  I think I use ribbon on about every card I make, but it's good to change it up once in a while.  ;-)  I gave the bird some extra shimmer by going over it with a Saukura Gelly Roll pen in red, and smudging it with my fingers to spread the sparkle around.
Here's a closer look at the sparkle on the birdie.  I'm so glad you could drop by today, and I hope you're enjoying a wonderful weekend.  Have a blessed day, and happy crafting!

Wednesday, October 26, 2011

Simple Elegance

Good morning, and welcome to The Scrapping Cottage Blog!  I hope you're enjoying a beautiful day wherever you are.    Have you seen the beautiful Cottage Cutz dies that have been released for Christmas?  Oh my goodness, are they EVER fabulous!!!!  Now, I am a big fan of coloring, and using many different mediums for coloring, from watercolor, to Copic markers, to paint, but once in a while, I like to create a card that is quick and easy, but looks like I spent a lot of time on it.  Simple elegance is how I like to describe those creations.  Here's what I came up with using the Snowflake Ornament Cottage Cutz die, and I've included a little picture tutorial so that you can see how I put it together.  These little honeycomb type cards are so much fun, and the three dimensional effect is so showy.

 To begin this project, you will need to cut 5 of the ornaments in your choice of card stock.  I used a metallic silver.  Place the cut ornaments on a scoreboard, and score right down the center.  As you can see, scoring at one inch worked perfectly.
 Once you've scored and folded all the pieces in half, the you can start gluing them together.  Start by placing adhesive on the left under side of the first ornament, and gluing that to the right under side of the second ornament.  Keep going until all 5 pieces have been glued.  You should have the left under side of the first piece, and the right under side of the last piece free from adhesive.  You will add adhesive to those when you're ready to put the ornament on your card.
 Once the ornament has been secured and is dry, you can add some sparkle.  I used a 2-way glue pen and some Martha Stewart white gold glitter.  Kinda messy, but that's the way I roll!  ;-)
 The finished 3-D ornament.  Gorgeous!!  I did take a Zig Painty pen and color the top with a bit of gold.
Apply adhesive of your choice to the back side of the ornament and secure to card front.  The embossing folder I used is a Cuttlebug embossing folder called Christmas Ornaments, and I do believe that it's discontinued now.  I did work perfect for this card, which made me very happy!!
VOILA!!!  One completed very simple and elegant card!!  Wouldn't these make wonderful ornaments for a mini tree?  You'd need to add a couple more cut ornaments to allow them to come full circle when you glue them all together, but that would work great.

Have a blessed and beautiful day!

Thursday, October 6, 2011

Test Tube Treat Box

Good morning!  Today, I have  a cute little Halloween treat gift giving idea to share  with you.  Last week I saw this project showcased on the Splitcoaststampers website, and thought it was the cutest thing, so when I was in the big city on Monday, I stopped by the craft store to pick up some of these test tube treat containers just for this post.  I found them at Michael's, and they are made my Martha Stewart Crafts.  When I saw the dimensions of this little box, I just knew it would be the perfect size for the Cottage Cutz mini dies, and I was right!  They fit on this box beautifully, and I can't wait to make a whole bunch of these for my sweet trick or treaters.  I don't get many Halloween visitors out here in the country, but those that make the trek will get something extra special!!  You can find complete instructions on how this box was made HERE.
 Here's a view of the finished box without the test tube, so that you can see the "Boo" that was cut from the Kara Ashley Alphabet die.  (I didn't have room for an exclamation mark, or I would have added that.)
For this crafty project I used the Owl and Lantern mini Cottage Cutz dies, and I also used the Kara Ashley Alphabet die to make the word "Boo" on the top of the box.  All of these fabulous dies and so much more can be found at The Scrapping Cottage.  While at CHA last winter, I had the pleasure to meet my fellow DT member, Barry, and he taught me the handiest little trick.  Barry says that most of the time he glues 2-3 layers of cut card stock together, almost making his pieces more like chipboard.  Since most of the time, I color my cut pieces, that doesn't work for me, but I do find that especially when cutting letters, it's a wonderful technique.  It gives them dimension without needing to use foam dots, and it also gives the pieces a more sturdy construction, making them much easier to work with.  Thanks for that tip, Barry!  When you see Barry's work in person, you can really tell that he takes that extra attention to detail and turns his projects into something so special.  It's the little things, I'm tellin' ya!!!  I tell people all the time that it's all about the details!  ;-) 

I hope you like my project today, and that you're happily preparing for those little ghots and goblins who will be visiting you!  Have a wonderful day and happy crafting!!!


Monday, September 26, 2011

Wizard Wobble

Good morning!  It's a beautiful Monday morning, or at least I hope it's a beautiful Monday morning for you.   I'm still in the Halloween spirit, playing with my Cottage Cutz Halloween dies.  Today I bring you a card I made for Barry's challenge this month, which is to create a motion card.  I used this cute Deuce the Wizard die, and I popped him onto an Action Wobble to create the movement.  Old Deuce has the earth shaking with whatever potion he's got cooking up in that pot!  LOL!!!  I also used the Grass Border die from The Scrapping Cottage on this card, as well as the Ornate Circle Frame.

Deuce was cut with white card stock, and everything was colored with Copic markers, however, I did run the die through the Big Shot a second time, using patterned paper for the robe and hat.  Below, is a short video I took, (trying out my new camera) to demonstrate the movement the Action Wobble gives.  


It's not so easy to hold the camera and make the Action Wobble move, but at least you get the idea here.  There's still plenty of time to play along with this months challenge, and there's a great prize being given away to one lucky player!  What on earth are you waiting for?  Get out those Cottage Cutz dies, and get movin' with those motion cards for Barry's challenge!!!!   You can find the details here, or you can click on the blinkie in the top left side bar of the The Scrapping Cottage Blog. 

It's great seeing you here today!  Have a good one, Cottage Cutz fans!


>